Last November I started working on a toy DX12 renderer. At first my intention was to add a new backend for Milton, but after I got the first triangle going it became pretty addictive to just keep going and see where I could take it. Here’s a write-up of what I’ve got going!
As I have grown this system, my main focus has been on API design and the core rendering API. I wanted to have an engine I could use to write small games and test apps with as few lines of code as possible. It needed to be flexible enough to be used as a test bed to try out different graphics techniques but I also wanted it to be useful as an actual game engine.
In this post I will go through how the system has grown from a triangle on the screen to a toy engine that I could use on a game jam.
The intended audience are people with a little background in graphics programming or people who are interested in writing a 3d engine from scratch. It’s not super technical but I do throw around many graphics terms that I don’t bother to define since this is already a lot of text.
The first triangle, and setting up pipeline states
I started by looking at some sample code and copying things over while looking at the functional spec.

A lot of the work that I put in to get the triangle going was the bare minimum necessary, but I also tried to introduce some initial abstractions. One of my goals with this project is to write more than one backend, so the API hides all of the DX12-specific details.
Here’s an example of the API for creating graphics pipeline state objects (PSOs):
PipelineStateHandle gpuGraphicsPipelineState(
                        u8* vertexByteCode,
                        u64 szVertexByteCode,
                        u8* pixelByteCode,
                        u64 szPixelByteCode,
                        const PSOFlags psoFlags);
It takes an array for the vertex shader bytecode and one for the pixel shader bytecode and returns a handle which we can use with a corresponding gpuSetPipelineState.
It’s a pretty common pattern in game engines to use handles to reference data, and my engine is no exception. Every handle is a type-safe index into some array. Most handles are defined in a single line like so: struct ObjectHandle { u64 idx; }; I define them with structs instead of using a typedef to get some type safety.
As a quick aside while on the topic of handles, for any array that is indexed by handles, its zero-th member is always some sentinel value. The most common bugs in game engines are invalid handles, so while 0-valued handles are invalid in this engine, we use some very conspicuous value for zero-th elements. A 0xFF00FF flat-colored material, for example. This works super well with initializing everything to zero by default and while it doesn’t handle out-of-bounds errors, it does handle a very common case of trying to use something that has been explicitly marked as invalid.
PSO handles are a little different in that they consist of an index and also a type, so the engine can distinguish between raytracing pipeline states and regular compute and graphics pipeline states, to cut down on the number of functions.
In this engine we create all the PSOs in a single function. We have PSOs for meshes, UI elements, certain test cases, and SDF objects, more on all of that later! All of them get explicitly created in a single place. It’s a simple solution and I haven’t needed anything more complicated. I keep the number of PSOs down by relying on scalar branching (for a small runtime hit) instead of doing static branching. In other words, instead of using #ifdef’s in shader code and compiling different variations, I pass knobs in constant buffers and the shaders do some branching. Another design goal of this project is that small iteration times and quick development are higher priority than runtime performance.
So, we have a nice blue triangle and the beginnings of a render API. What’s next? Texturing.

One early decision was to go with a bindless binding model, where there’s just a giant descriptor table and we “bind” resources by passing indices into an unbounded array. The only reason I went with bindless is that it seemed like less work and simpler PSO management code.
As the engine currently stands, any texture that gets uploaded to the GPU lives forever, on the GPU side.
struct Texture2D
{
   ResourceHandle resourceHandle;
   u64 srvBindIndex;
   u64 uavBindIndex;
};

Texture2D gpuUploadTexture2D(
            int width, int height, int bytesPerPixel, const u8* data);
The texture uploading code should be easy to understand from just looking at the function signature. I included the Texture2D definition to show that textures are just a handle to the GPU resource and a couple of bindless indices corresponding to the shader resource view and unordered access view in our descriptor heap.
If I do end up adding the functionality to free GPU textures, this API wouldn’t change, it would simply look at some free-list internally when allocating descriptors. Same thing if I add functionality to control memory residency.
This little textured quad is actually sitting on an early Mesh abstraction layer. While we’re at it, we might as well write an OBJ loader and load something!
Loading a bunny, and some notes on memory management
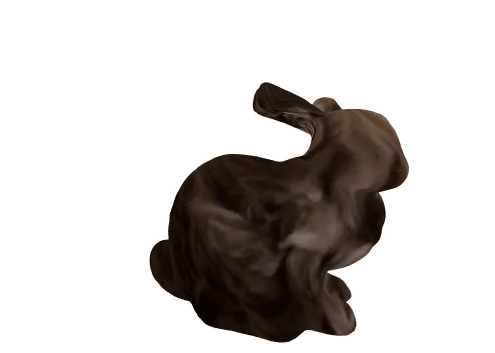
And yes, I did use the same dog picture to texture the bunny, because why not. You might notice that besides the model being different, this gif has some nice antialiasing going. All I did was set up a multisampled render target and do a resolve at the end of the frame.
Speaking of which, in the spirit of simplicity, the render frame fills a single command-list and then executes it in the same frame right before presenting. As of today things are set up so I could set up something more involved without much trouble, but this works for now. It’s not like I’m sending tons of work to the GPU. There’s also still no command list abstraction. We are using a single command list for everything. This will probably change as I start to do more stuff each frame. I will likely start filling command lists in parallel before I decide to buffer a frame of work.
If I do add a command list abstraction, the API will have the same style, with a handle corresponding to the command list and an immediate-mode function call to set the current command list being filled.
The OBJ loader function looks like this:
Mesh objLoad(Platform* plat, char* path, Lifetime life);
Pretty self-explanatory if I do say so myself, but you might be curious to know what that Lifetime thingie is. For most use cases, a lifetime is an enum value of either Lifetime_App, Lifetime_World or Lifetime_Frame, meaning the the allocation will either last forever, or until the “World” (aka Level) ends, or when the Frame ends. We do this instead of malloc and free and it works pretty well. Many allocations are per-frame, and most allocations correspond to the other two life times.
There’s a couple allocation functions that take a lifetime as a parameter, so we never explicitly free things, we just specify at allocation time how long something will live. For example Something like int *someInts = AllocateArray(int, 10, Lifetime_Frame); will allocate 10 ints for the current frame.
For more complex cases, there’s a custom lifetime API
Lifetime customLife = lifetimeBegin();

    // Do allocations with customLife
    doStuffWithAllocations(customLife)

lifetimeEnd(customLife);  // This will zero-out the memory,
                          // so any use-after free bug will be obvious!
3rd party APIs often ask you to give custom allocators, and so I also have some functions to make third party systems work with this scheme. In most respects Lifetimes are exactly the same as arenas (aka stack allocators)[1] except that they are indices into a global array of heaps instead of pointers to an allocator. There’s nothing you can do with this that you couldn’t do with arenas, but I like using these instead of passing around allocators.
The whole engine follows a zero-is-initailization philosophy [1]. All allocations return zeroed-out memory and all stack declarations are initialized to zero. For this reason we do not support constructors and destructors, but the huge win of not having uninitialized-memory bugs is more than worth it, and we never need to call free(). To be honest, I haven’t spent a second missing RAII since I stopped using it.
And while we’re on the topic of memory management, GPU memory management works a bit different.
ResourceHandle gpuCreateResource(
        size_t numBytes,
        char* debugName = nullptr,
        GPUHeapType heapType = GPUHeapType_Upload,
        ResourceState state = ResourceState_GenericRead,
        u32 alignment = 0,
        CreateResourceFlags flags = CreateResourceFlags_None);
All GPU memory is allocated with this single function, which in DX12 for now directly maps to a CreateCommittedResource call. This will probably change soon, since my first real performance bug was having tons of calls to CreateCommittedResource. I don’t expect the API to change much when I fix this. I will probably just create a placed resource in global heap by default, and add a flag to specify when we do want a heap created along with our resource.
I really like the Dear ImGui style of using default arguments that make sense. Most allocations are for quick constant buffers, and the default arguments reflect that. Here’s a typical use case, taken from the engine:
Material m = {};
m.gpuResource = gpuCreateResource(
        sizeof(MaterialConstantsCB),
        "Material constants");
Debug names are ignored in release, but they are really useful when debugging. I am thinking of actually making that parameter a requirement, since sometimes I’m lazy and I don’t add the name until I need it.
There’s a function to free GPU memory, which is done is such a way that resources don’t get released until after the frame is done with them.
You might see the gpu() call and wonder what that is, which is a nice segway to globals, which are closely related to hot-reloading.
Globals and hot-reloading
The engine supports hot reloading of both shader code and C++ code. The way this is done on the C++ side is by separating the platform layer from the engine/game layer. The platform layer being the executable, with the engine and game code living in a DLL. When not in release mode, every frame the platform layer will check if the DLL has been written to (and has finished being written to), and then load the code with LoadLibraryA(...). The only way this is different from Handmade Hero[1] is that instead of passing a pointer to game memory, each game system has an entry in a global table of pointers. When the app starts up, it asks each system how much memory it needs, by means of a callback, and sets up the memory. This table of globals is patched up again everytime the DLL reloads.
While we’re getting C++ hot reloading, might as well touch on HLSL reloading. Thankfully, it’s much less involved, architecturally speaking. There’s a separate program that calls D3DCompileFromFile for our graphics and compute shaders, then puts everything in a simple binary file. For ray tracing shaders we need to use the interface to DXC, but for compatibility reasons we use the older compiler for graphics and compute. The platform layer checks every frame if this binary file has been changed. Remember the big explicit list of PSOs? We just create them again once the binary file has changed.
But I’m getting ahead of myself! Before I got hot reloading working I actually dived into physically based rendering, which was another big hole in my piecemeal graphics programming education before this project.
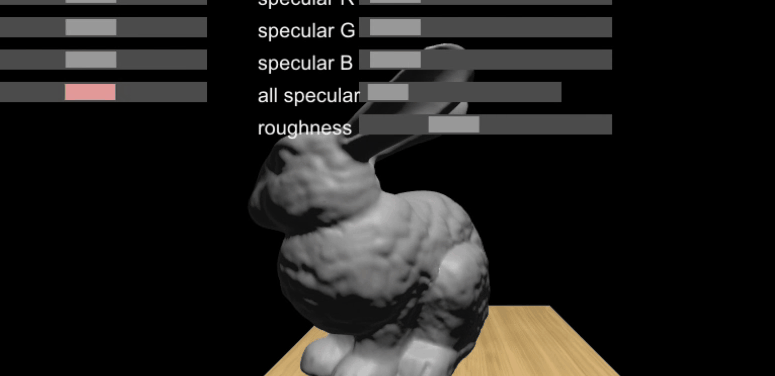
PBR and UI
Ooooh yes, the engine is starting to look good. For PBR I decided to go to the source and read some of the main papers on the topic. In retrospect, I think this was just making things unnecessarily painful on myself. If I could go back in time and give me some advice it would be to just read Google’s Filament documentation to really understand PBR. Also, to invest in toilet paper and hand sanitizer.
I found microfacet theory to be very beautiful. I didn’t spend enough time with it to deeply internalize it, but I have to say, PBR did mess my brain up in that for weeks I couldn’t look at things in the real world without thinking of their BRDF.
Now, of course I needed to have some way to edit materials at runtime, so I did what any well adjusted member of society with a healthy social life would do and spent a week writing my own UI system instead of using Dear ImGui like everyone else.
I used stb_truetype for font loading and rasterizing.
I had two main reasons for writing the UI system myself. Number one, I wanted the UI used for the in-game menus to be the same UI in which the editor was written, and number two, I kind of felt like it. Also, it did help me a lot with ironing out some of the kinks in my fledgling engine.
The UI API looks very similar to Dear ImGui. Because it is a custom solution, it is very closely integrated into the engine, so we can treat world objects as first-class UI elements.
A little SDF experiment
At this point I was obsessed with Media Molecule’s Dreams. I read everything I could find about their tech and a lot of my free time was spent reading about volumetric billboards and point clouds and gigavoxels. I decided to start going in that direction
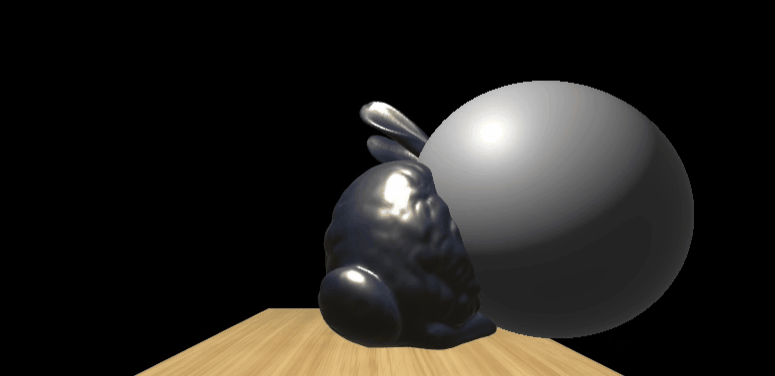
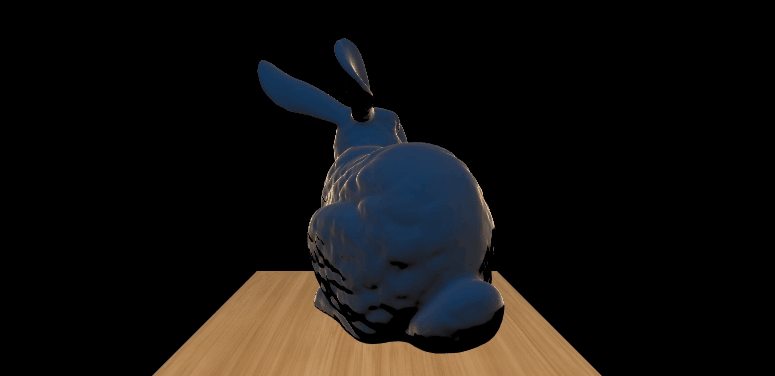
This is just a raytraced sphere with rays coming out of a full-screen quad, I used it as a reference to be used later to debug the SDF. The bunny intersects the sphere on purpose, since I was writing to the depth buffer from the pixel shader to make the hybrid system work (early Z be damned).
I’m a little surprised that I don’t have screenshots or videos of what came next, but I did end up with a simple SDF solution. The next step was similar to the gif above but it was raymarching into a SDF sphere. The “sphere” was a single “edit” in the media-molecule sense of the word, and the plan was to have entities in the world be comprised of lists of edits, I was 100% going for a poor man’s Dreams.
I worked a bit on trying to get the SDF to look lo-fi in a good way, but I learned that sometimes aliasing just looks like aliasing, and getting things to look good demands a lot of effort whether you are going for low fidelity or high fidelity. You can’t just use your bed hair as a reasonable hair style. The just-out-of-bed look requires a lot of hair wax and an appropriate bone structure.
There’s something to be said about polygon pipelines. I can write a Blender plug-in to import assets into my engine and piggy-back on tons and tons of existing resources. If I do end up looking for an artist to collaborate with, the pool of Blender users if very big.
If I wrote a custom SDF solution, the onus would be on me to create an artist-friendly pipeline with which to create all the source assets. I would have to either create everything myself or find someone willing to learn my custom tool set.
I didn’t want to start going down that path, so I resolved to switch gears. My next step was shadows.
Shadows and Ray tracing
First I implemented vanilla depth-map shadows, and then moved on to raytraced shadows.
For depth-map shadows, it was necessary to improve the core render API to handle render targets. I kept the minimalist philosophy and ended up with something that looks like this:
RenderTarget* gpuCreateDepthTarget(int width, int height, RTFlags flags = RTFlags_None);
RenderTarget is an opaque type. There are also functions to create color targets corresponding to either a texture or the face of a cube map, and a function to get the swapchain backbuffer, which is not created by the user. They all look similar to this.
The depth shadows at first were a standard implementation of spotlight shadows, and my intention was to use it as a reference for a ray-traced implementation on DXR.
The wrapper over DXR needed to expose two aspects. The first was a way for client code to define ray tracing shaders and hitgroups, which can be thought of as shader function pointers that get called depending on whether an object was or wasn’t hit. The second aspect was the creation of acceleration structures. Raytracing GPUs have an opaque BVH implementation, and they expose a two-level hierarchy, called the Top Level Acceleration Structure, or TLAS, and the Bottom Level Acceleration Structure, or BLAS.
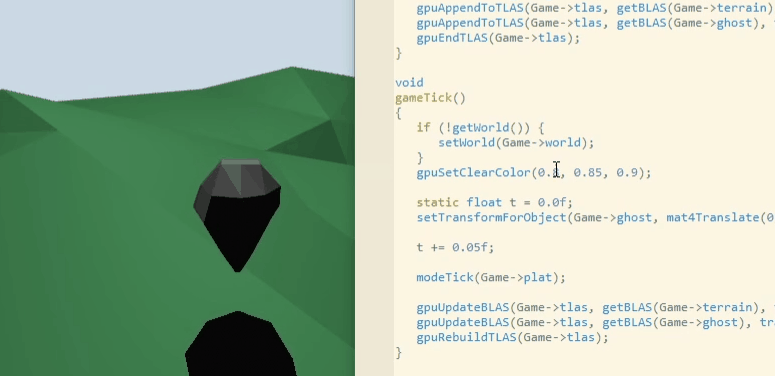
Here’s an example of how the engine rebuilds the TLAS every frame:
TLAS* tlas = gpuCreateTLAS(gKnobs.maxObjects);

ObjectIterator* iter = objectIterateBegin(/*stuff goes here*/);
while (objectIterateHasNext(iter)) {
   ObjectHandle h = objectIterateNext(iter);
   gpuAppendToTLAS(tlas, getBLAS(h), transformForObject(h));
}
objectIterateEnd(iter);
gpuBuildTLAS(tlas);

gpuSetRaytracingPipeline(wr->dxrPipeline);
The actual creation of the raytracing pipeline state is also pretty clean. I mentioned before that one of my main focus for this was having good API design, and actually wrapping DXR into something that’s nice to use is one of the things that makes me proud in that respect.
You don’t have to pay much attention to this code, I only put it here to show that it’s concise and not ugly at all.
if (gKnobs.withRtx) {
   RaytracingPSODesc desc = {};

   ShaderHeader h = shaderCode->headers[Shader_Raytracing];

   desc.byteCode = (u8*)shaderCode->bytes + h.offset;
   desc.szByteCode = h.numBytes;

   // Hit group 0
   {
      RaytracingHitgroup hitgroup = {};
      hitgroup.name = L"CastHitGroup";
      hitgroup.closestHit = L"TraceShadowRays";
      SBPush(desc.sHitGroups, hitgroup, Lifetime_Frame);
   }

   // Hit group 1
   {
      RaytracingHitgroup hitgroup = {};
      hitgroup.name = L"ShadowHitGroup";
      hitgroup.closestHit = L"ShadowHit";
      SBPush(desc.sHitGroups, hitgroup, Lifetime_Frame);
   }

   SBPush(desc.sMissIds, L"Miss", Lifetime_Frame);  // Miss 0
   SBPush(desc.sMissIds, L"ShadowMiss", Lifetime_Frame);  // Miss 1
   r.dxrPipeline = gpuCreateRaytracingPipeline(desc);
}
Now, I’m making a lot of choices under the hood that someone else might want to do differently, and my only use case so far is hard shadows, so it might get uglier in the future.
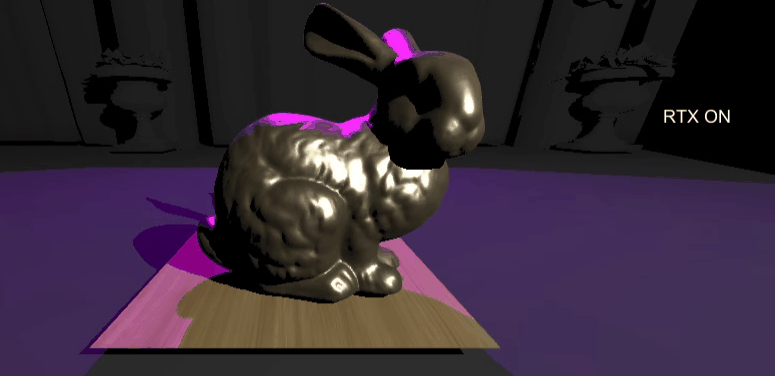
It was around this time that I resolved to use this engine for the next Ludum Dare. I think most people running a game jam game will not have an RTX video card, so I decided to switch gears yet again and polish the depth map shadows.
Point shadows, Ludum Dare and Conclusion
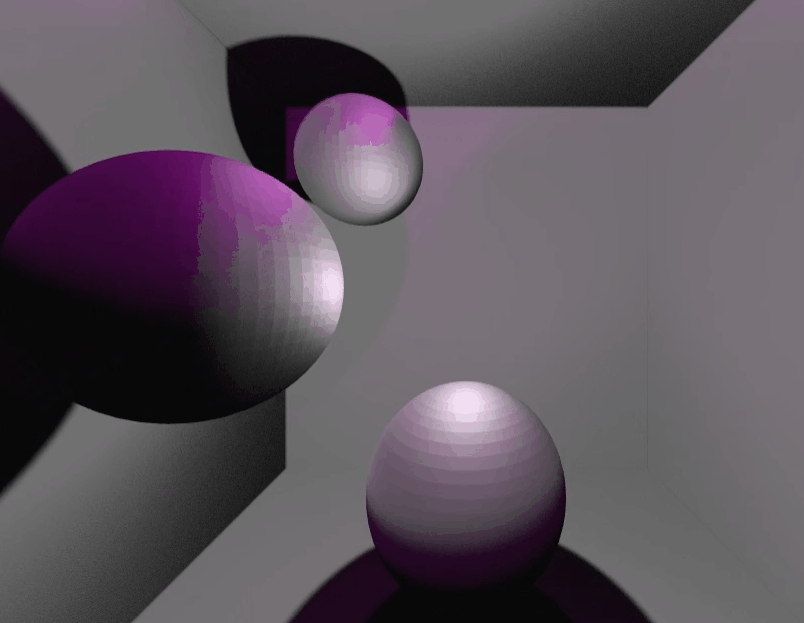
(A point light test. The dark shadows are all from the same light source.)
At this point, my lights were half-baked spotlights. The main thing that I thought was missing at this point was to either finish the spot light implementation or do some other kind of light. I decided that the most flexible light was the point light, so I went back to my depth shadow implementation.
I took the spotlight depth shadows and turned it into point shadows. I’m not doing mesh shaders or anything like that, just rendering everything 6 times per light and then doing some simple PCF post filtering. I’m using white noise which is probably a bad idea. I should switch to blue noise.
One problem that I ran into was that using a depth cube map didn’t quite work. Even though the math was right I was getting a lot of what looked like precision errors. Rendering to a f32 cubemap, outputting linear depth in the shader worked better, though it’s slower. But like I mentioned briefly before, the real performance bottleneck ended up being creating all those little per-frame constant buffers with CreateCommittedResource, and after I pre-allocated things, it got fast enough on my target low-end hardware (a macbook pro) with my target scene complexity (about ~50 low resolution dynamic objects on screen).
Once I had this, I took about a month or so to make everything solid and iron out the countless minutiae that comes into turning this from a renderer into an engine. Things like deploying and packing the game and handling screen resizing. I used a macbook with bootcamp as a “low end” target and I did things like leave the engine running overnight to try and make sure that things were solid. Once I knew I wasn’t crashing and wasn’t leaking and my test game was running well on the macbook, I was ready for Ludum Dare!
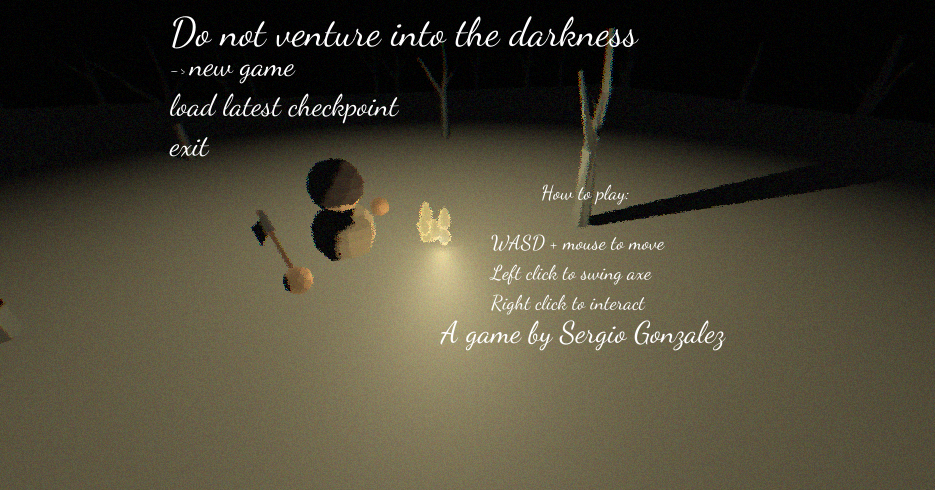

Writing the UI system from scratch ended up being a good thing, IMO, since the game has pretty nice UI for a Ludum Dare Compo game.
There are some things I didn’t mention. There are super important details like making everything gamma correct and doing dithering to avoid banding that are not a lot of code but are still pretty important. I have a cool testing system to quickly write up little functional tests. I also do some trivial unit tests for the few cases where I found it useful.
I’m not sure where I’ll take it from there. Last night I worked on a texture sampling test since I wanted to play around with different ways of sampling textures. I don’t have a plan in place and if I have learned anything about devlogs is that you should only talk about what you have done, not what you plan on doing.
If you made it to the end of the post, my hat’s off to you! Thanks for reading. I hope it was entertaining!
[1] A lot of the things I do come from Handmade Hero, so I’m just going to have an umbrella foot-note here to catch all the instances where my code style has been influenced by it.
>> Home